ENG
ENG
Product add-ons let you sell paid or free products along with the main product. In this option, the add-on can be displayed using several field types like – checkboxes, radio buttons, dropdown fields, and more. In this manual, we’ll show you how to add an add-on to your existing product.
Let’s start.
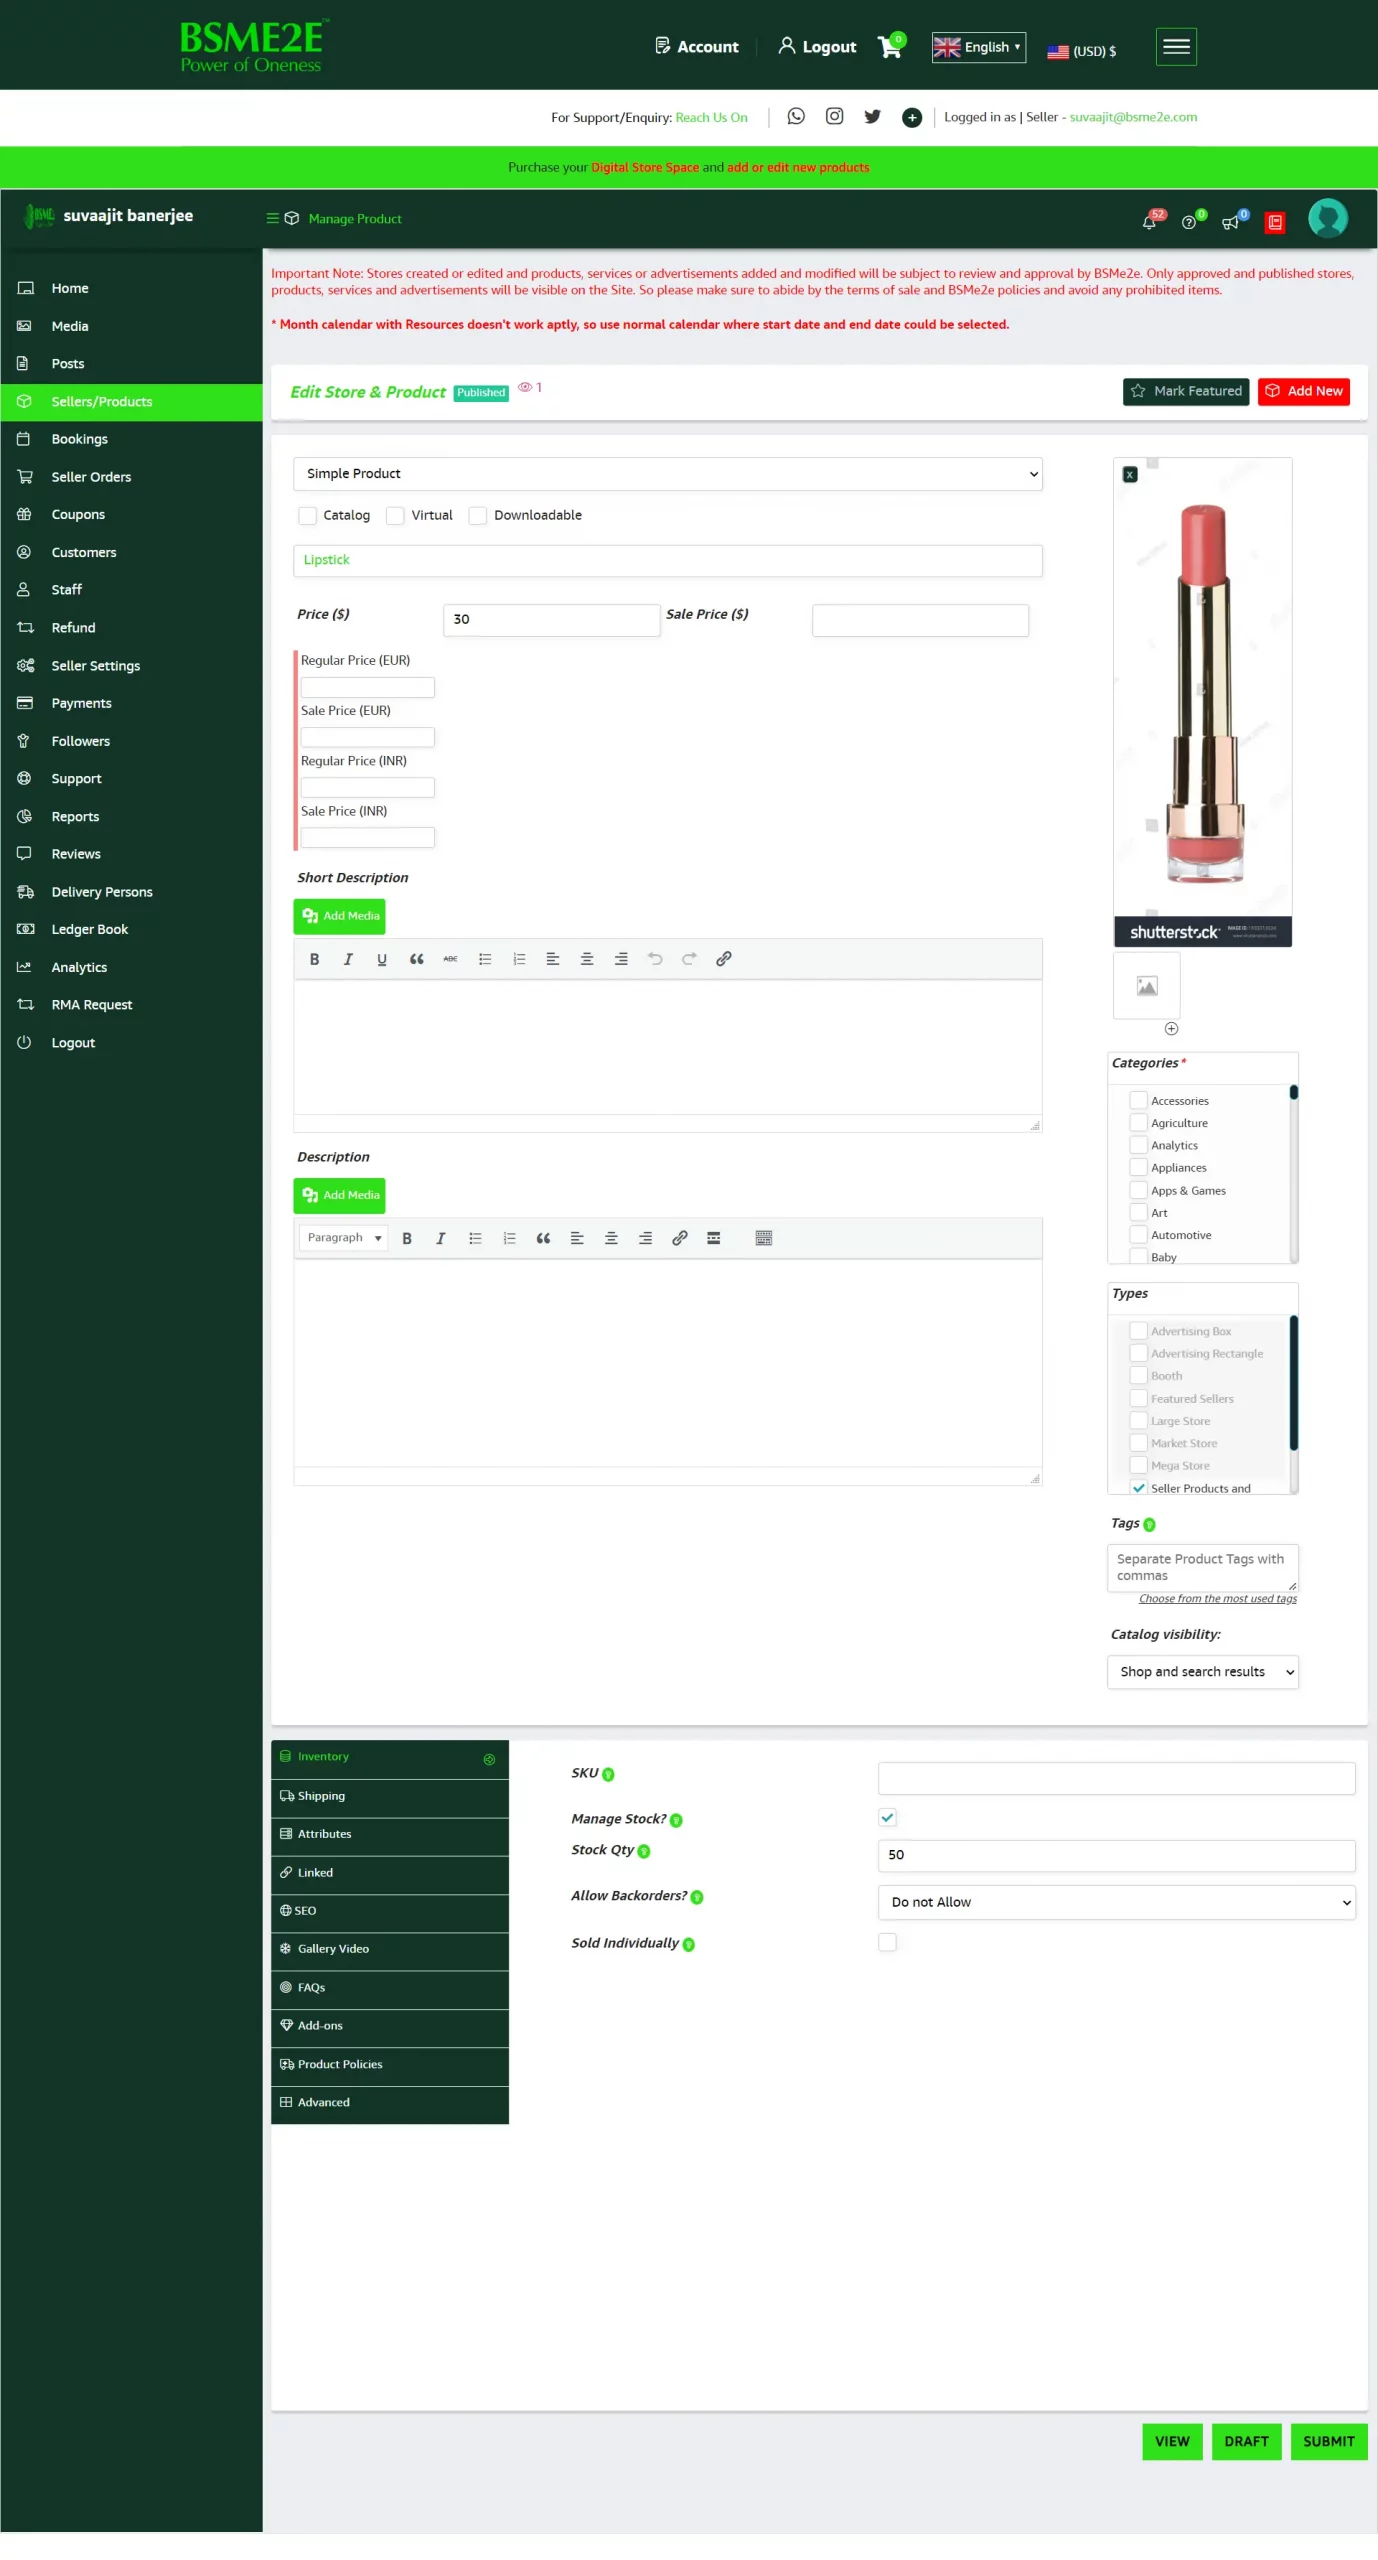
Go to your store manager, select sellers/products, and choose the product with which you want to add a paid/free option. In this example, our selected product is ‘lipstick’.
Click on the ‘add – on’ button. Refer to the screenshot below.
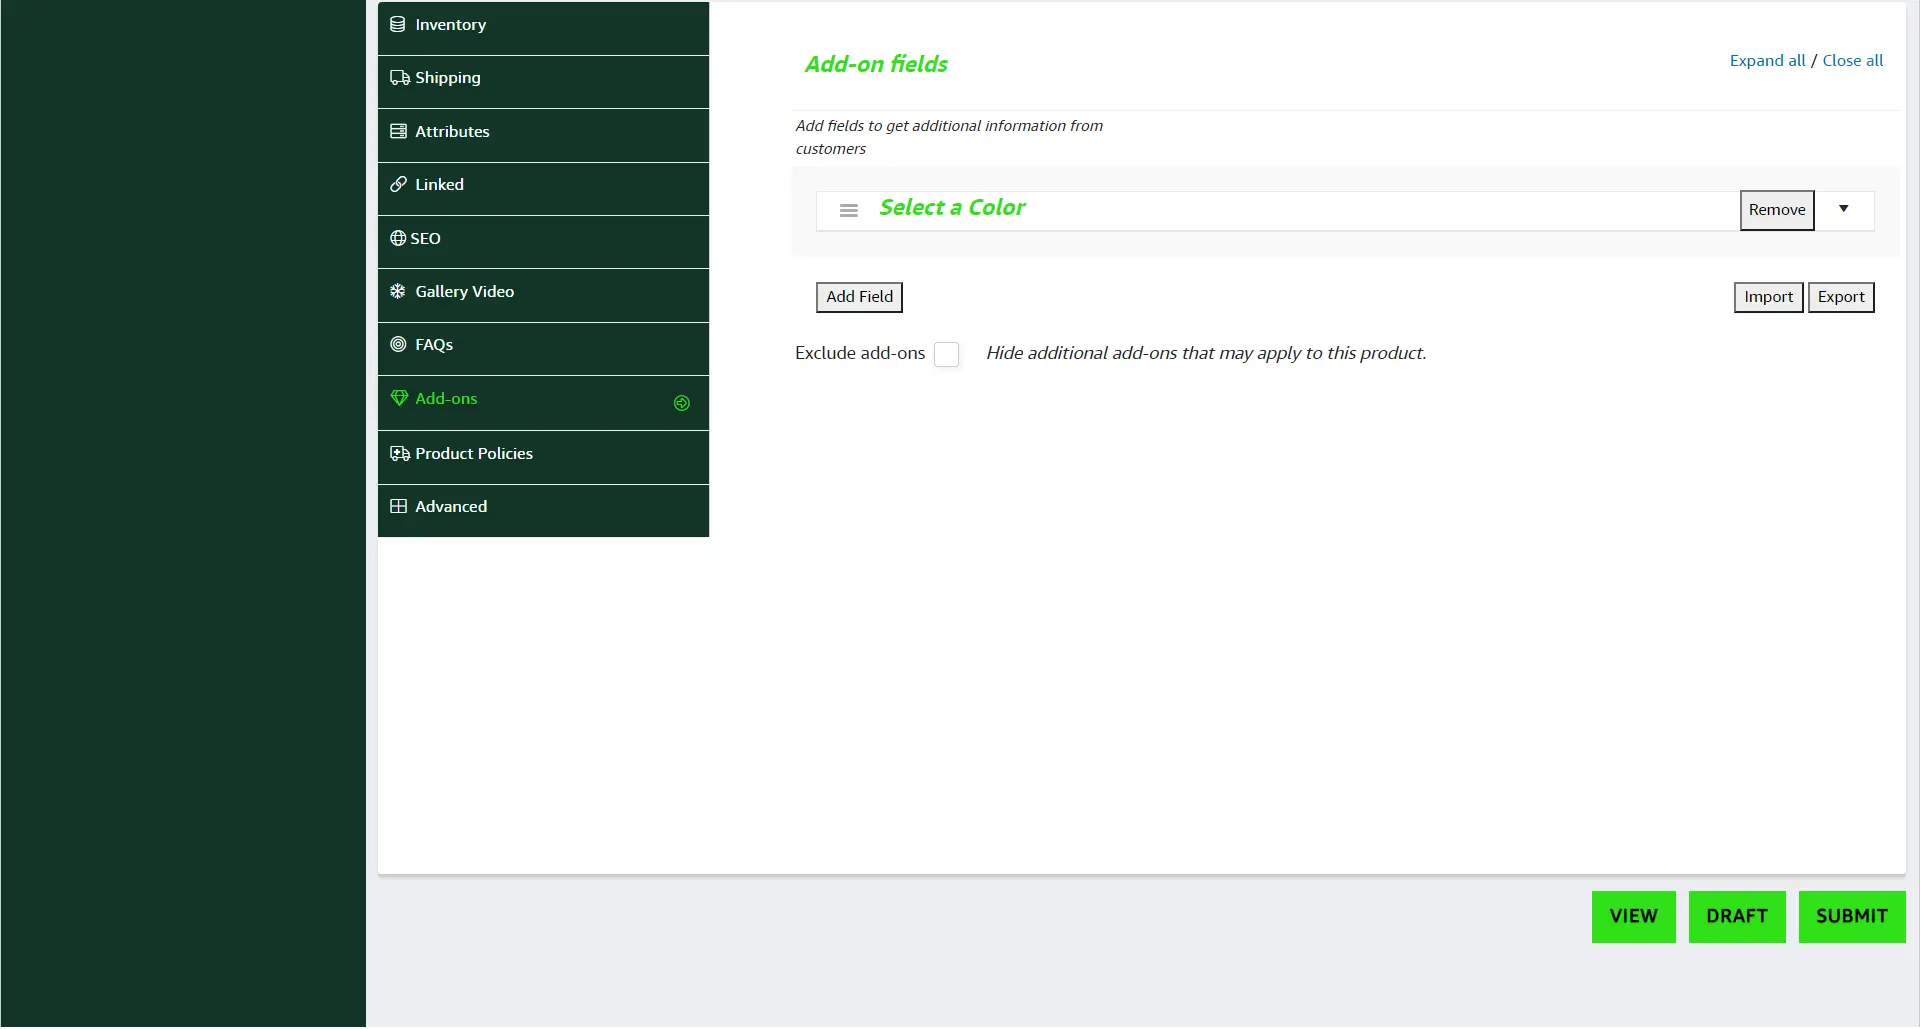
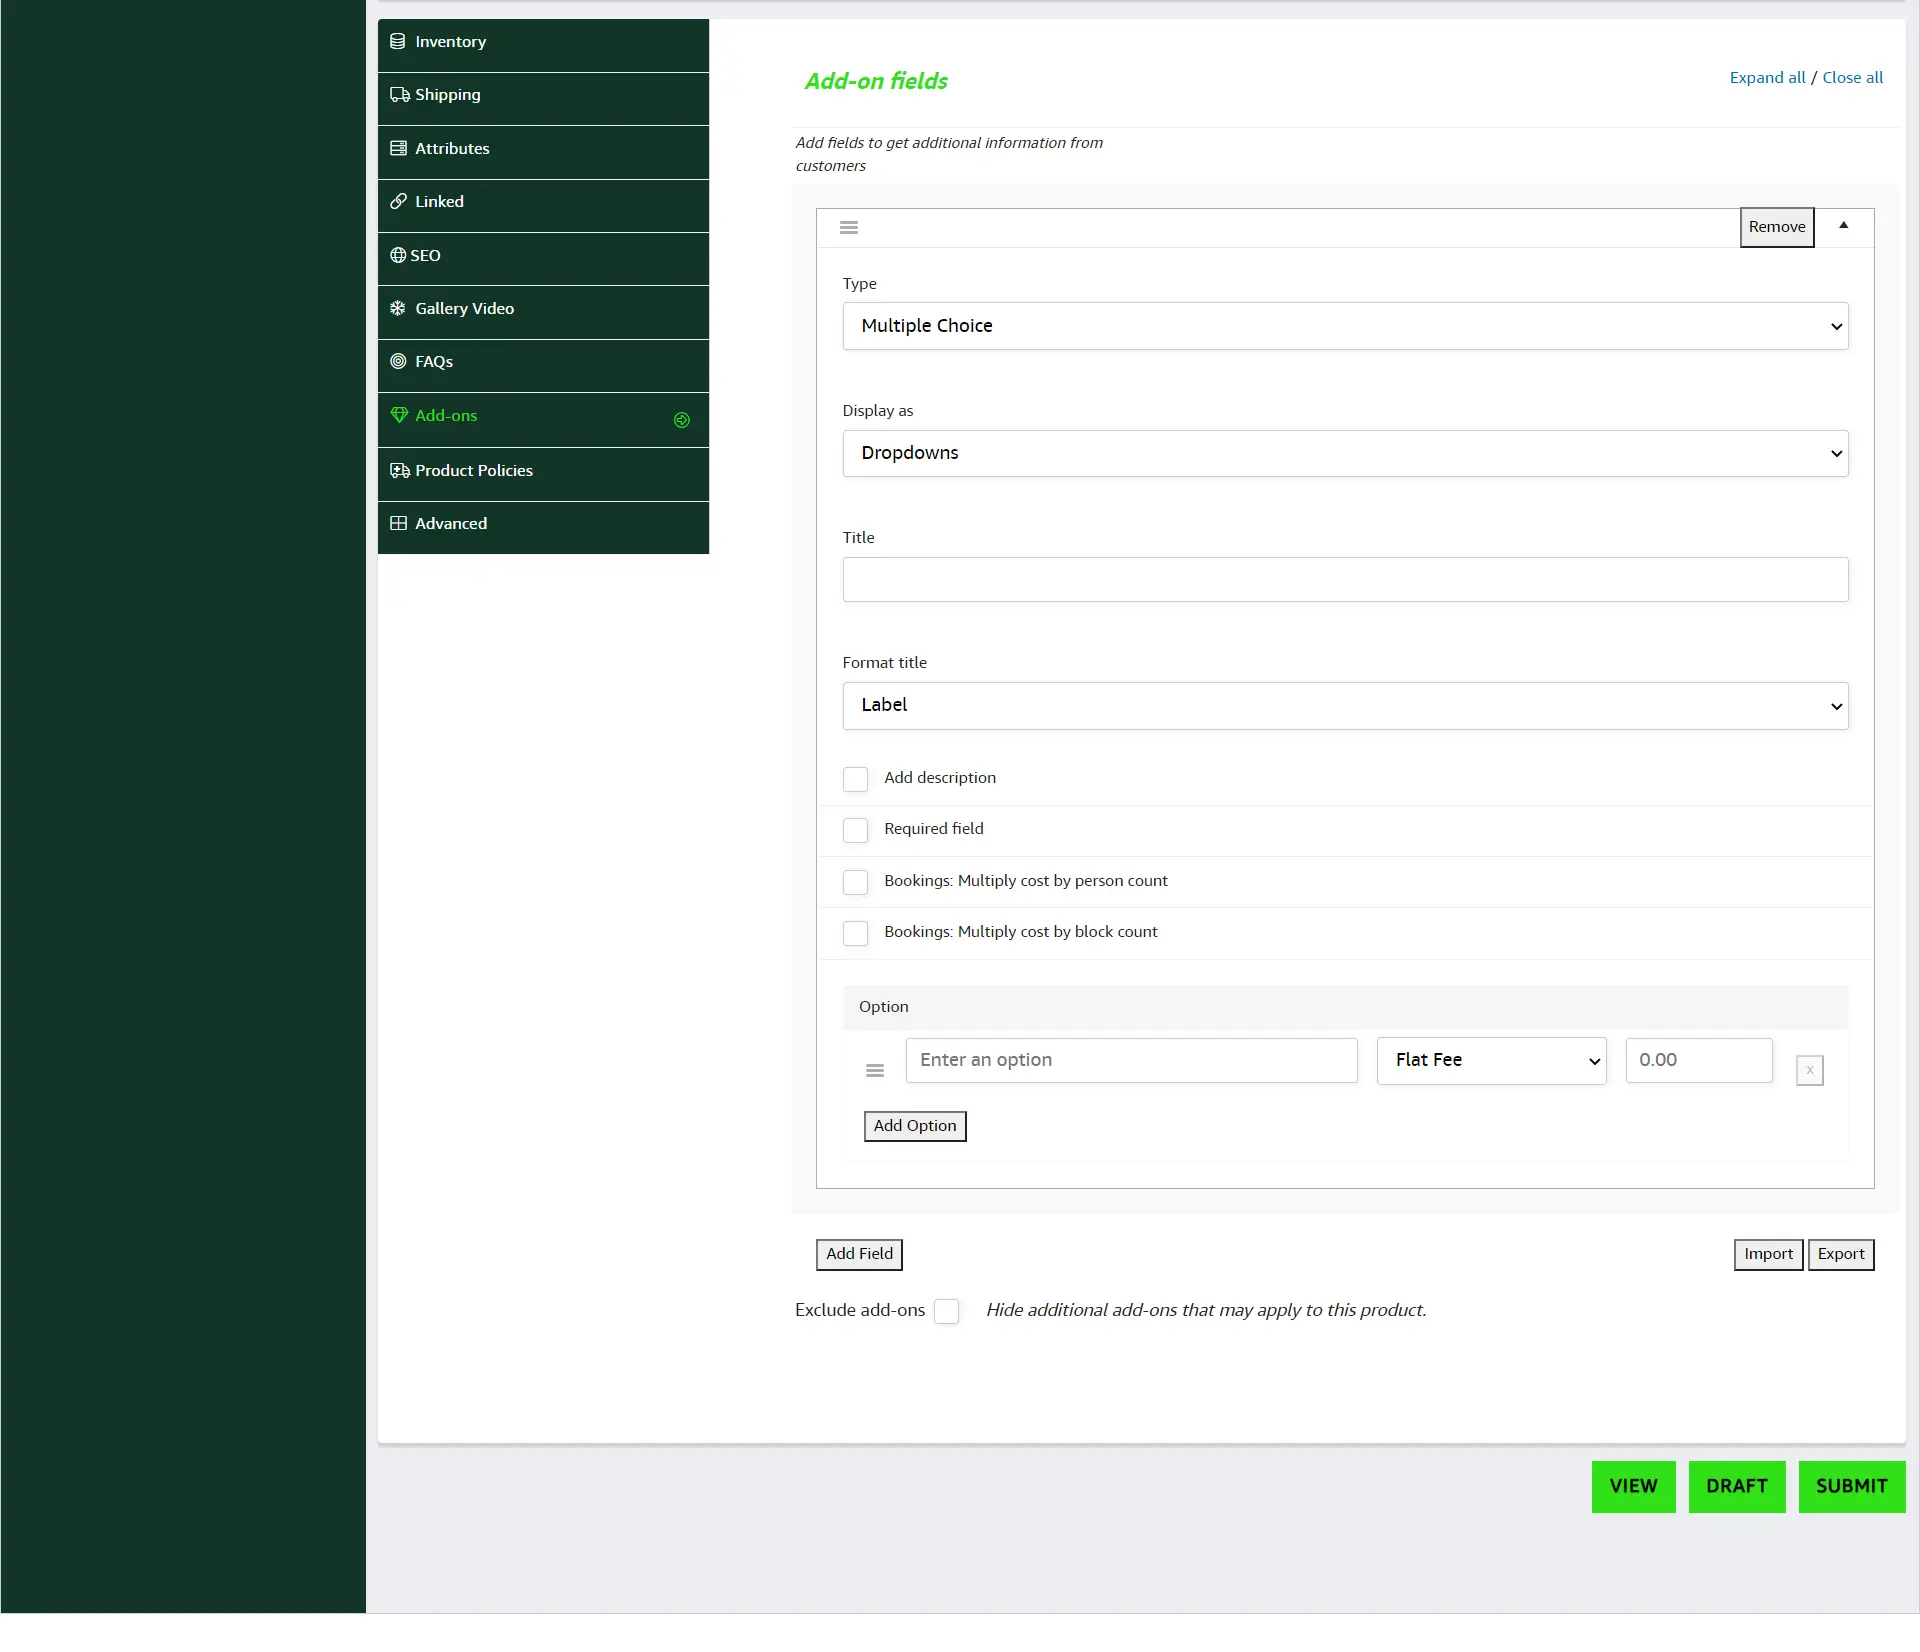
Click on the ‘add field’ option. You’ll see a new page as shown below in the sample screenshot.
We’ll explain all of the above fields in detail. Let’s take a look.
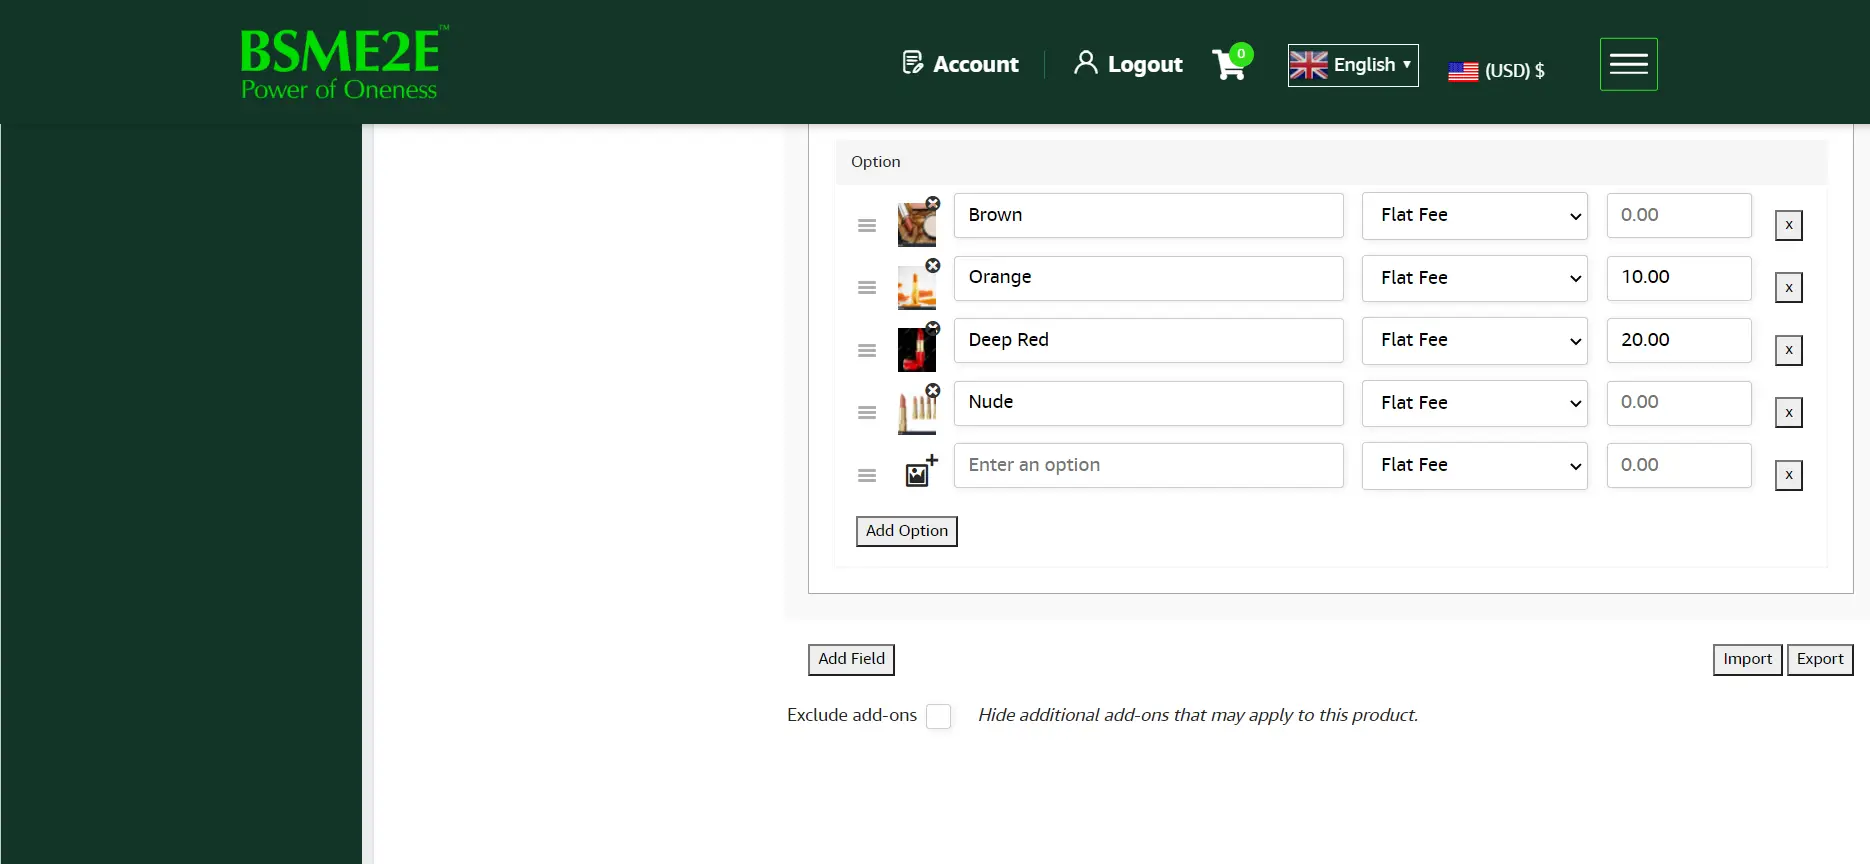
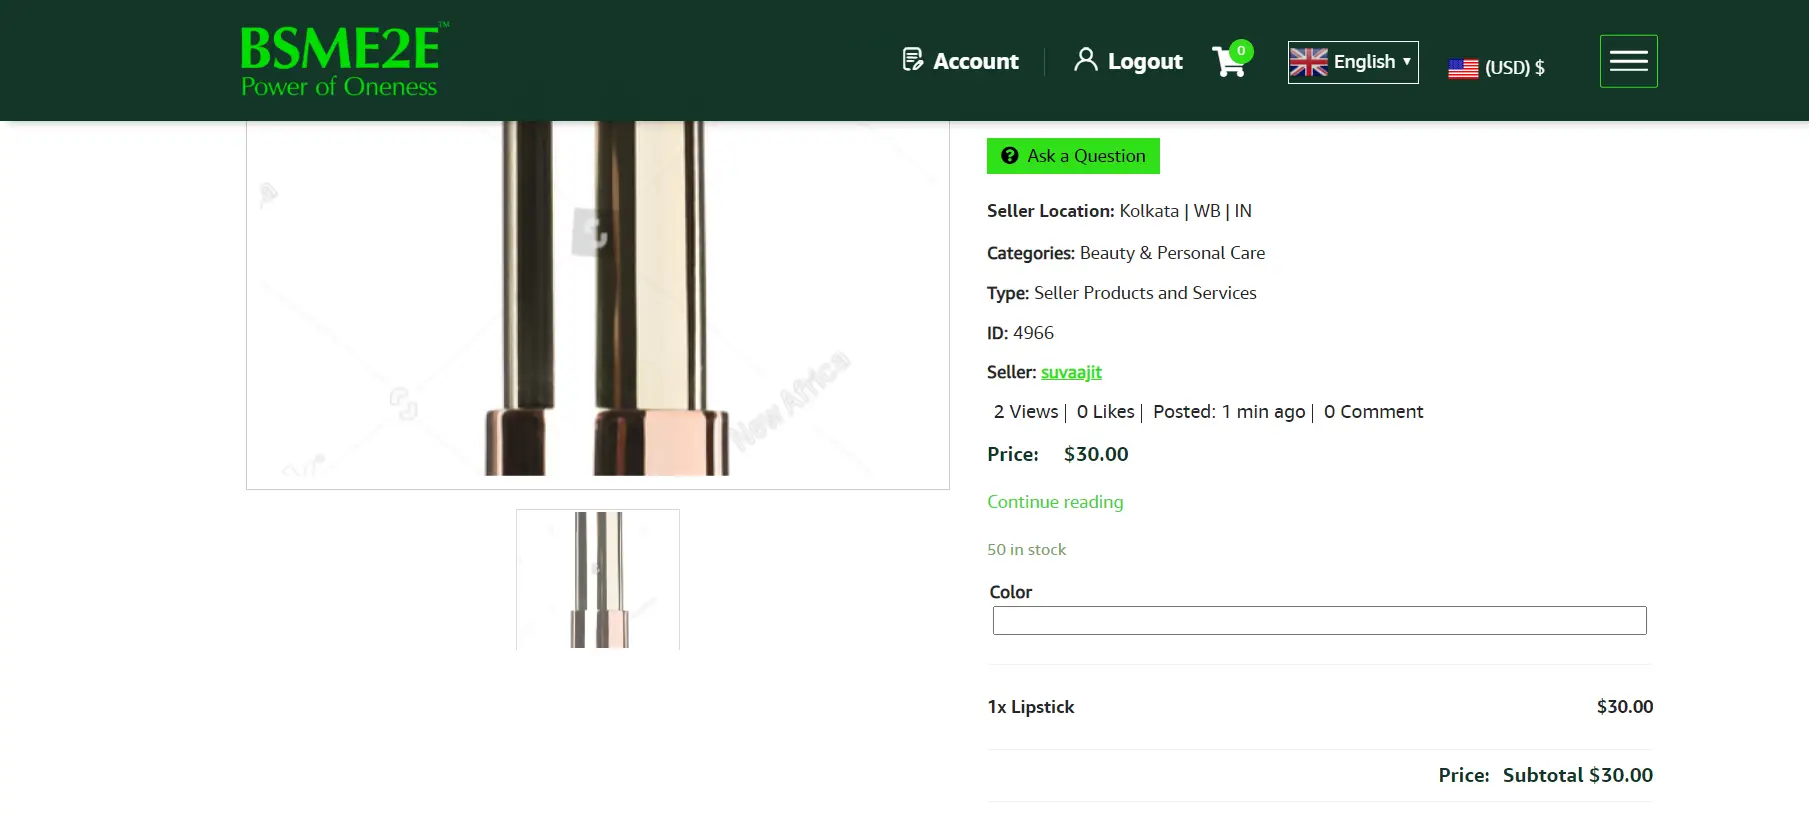
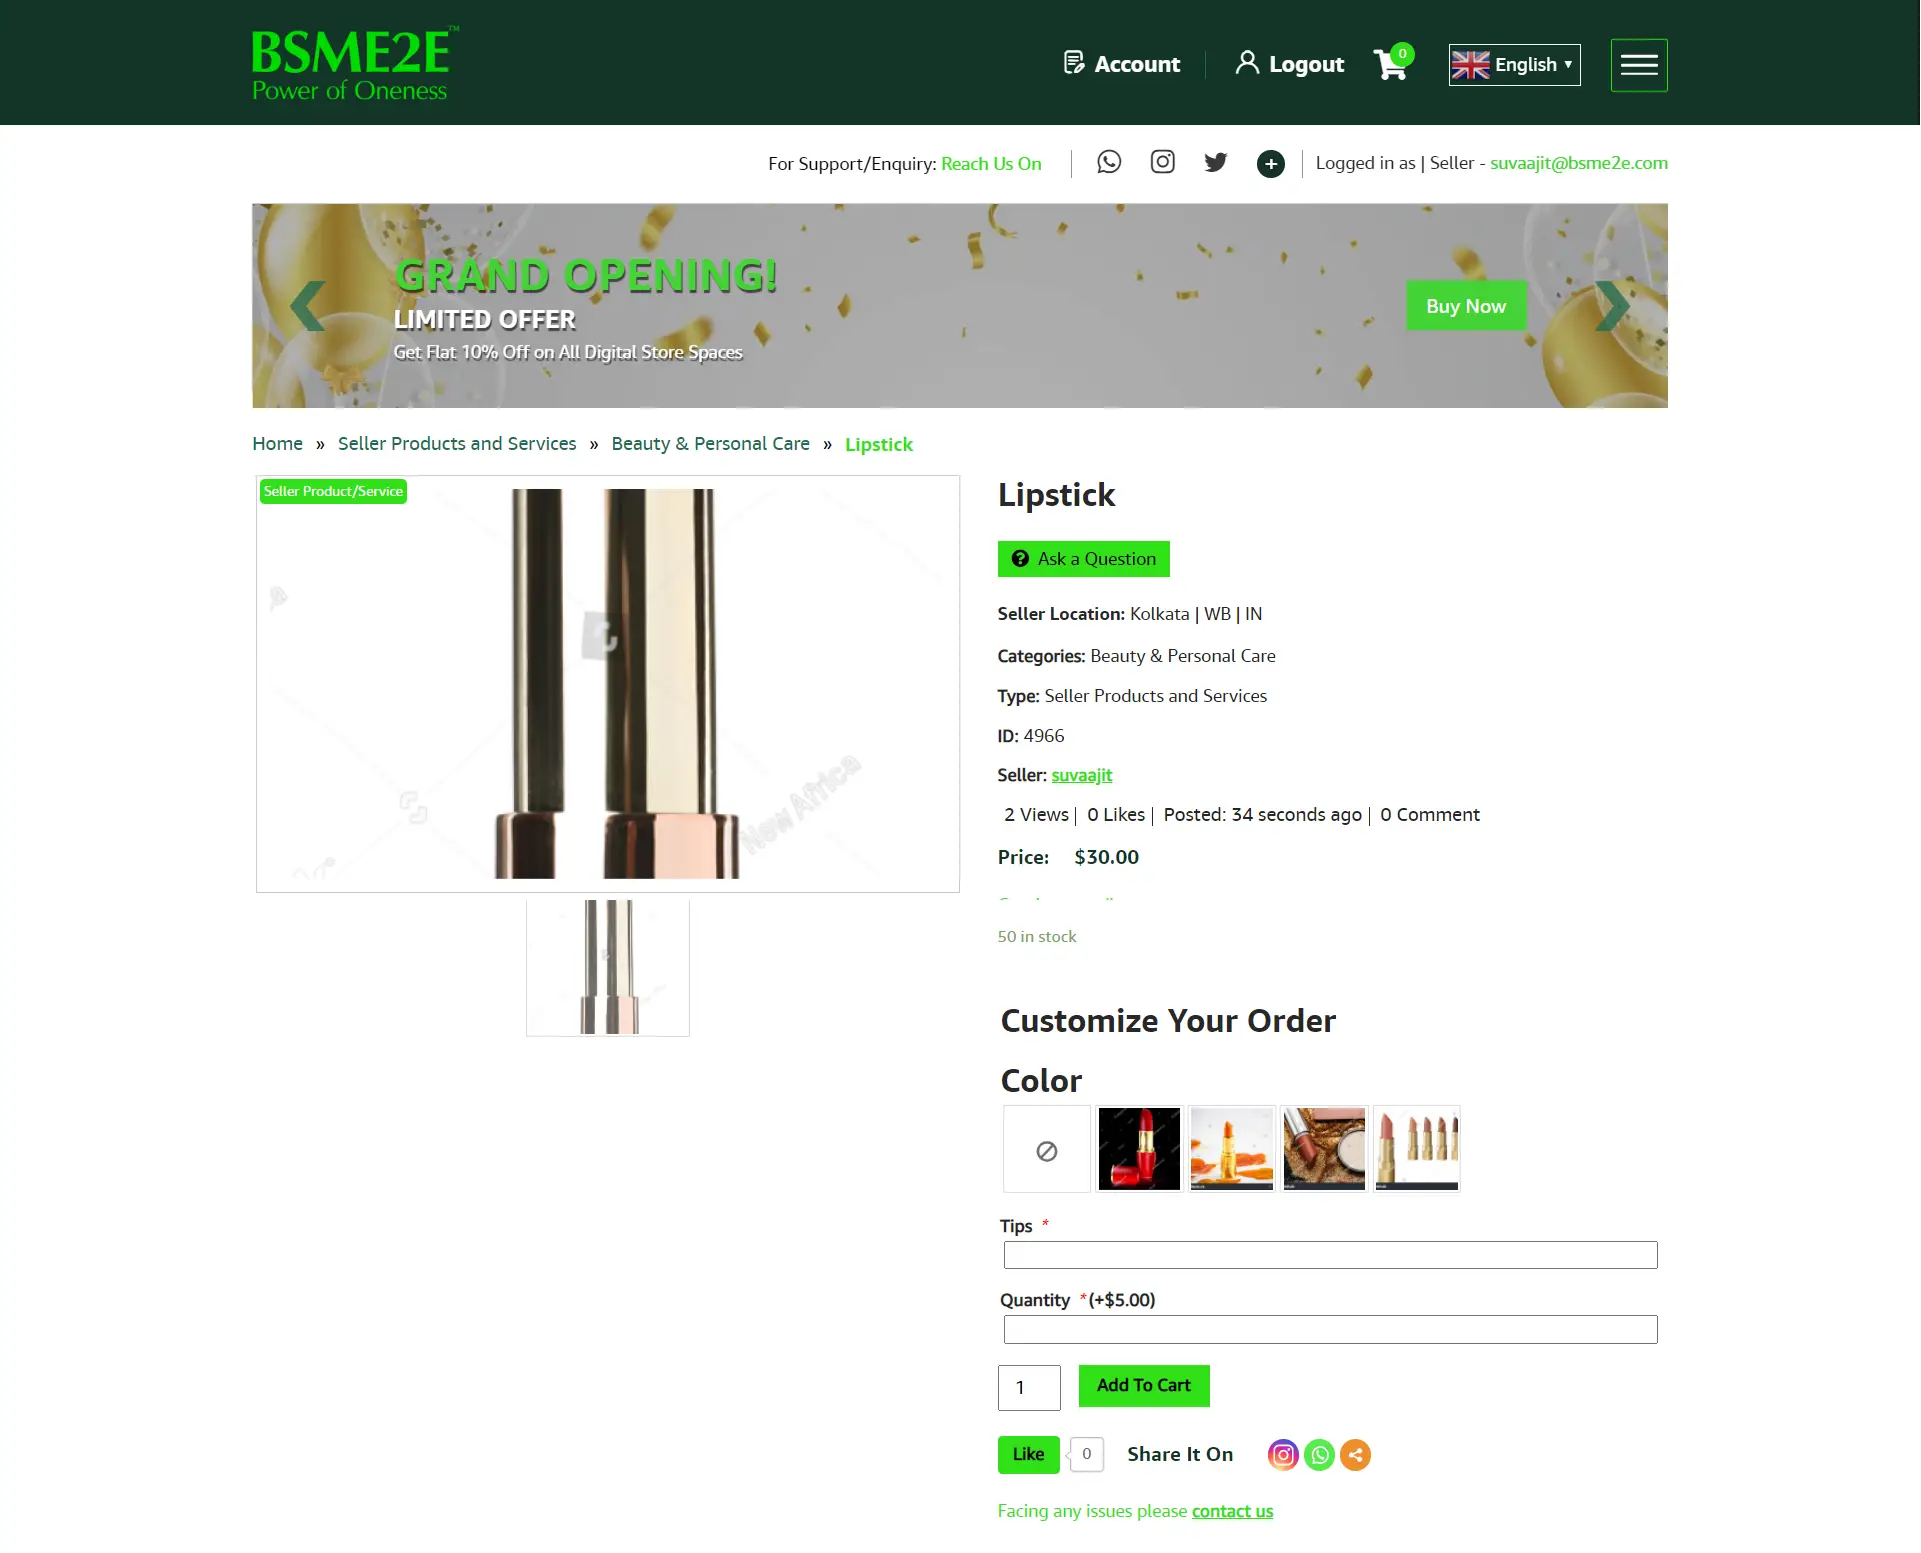
In this option, you can allow your customers to choose one option from a set of predefined options. Examples include – size or color. In this example, we have lipstick, so we will provide a range of color options. How to make this setting?
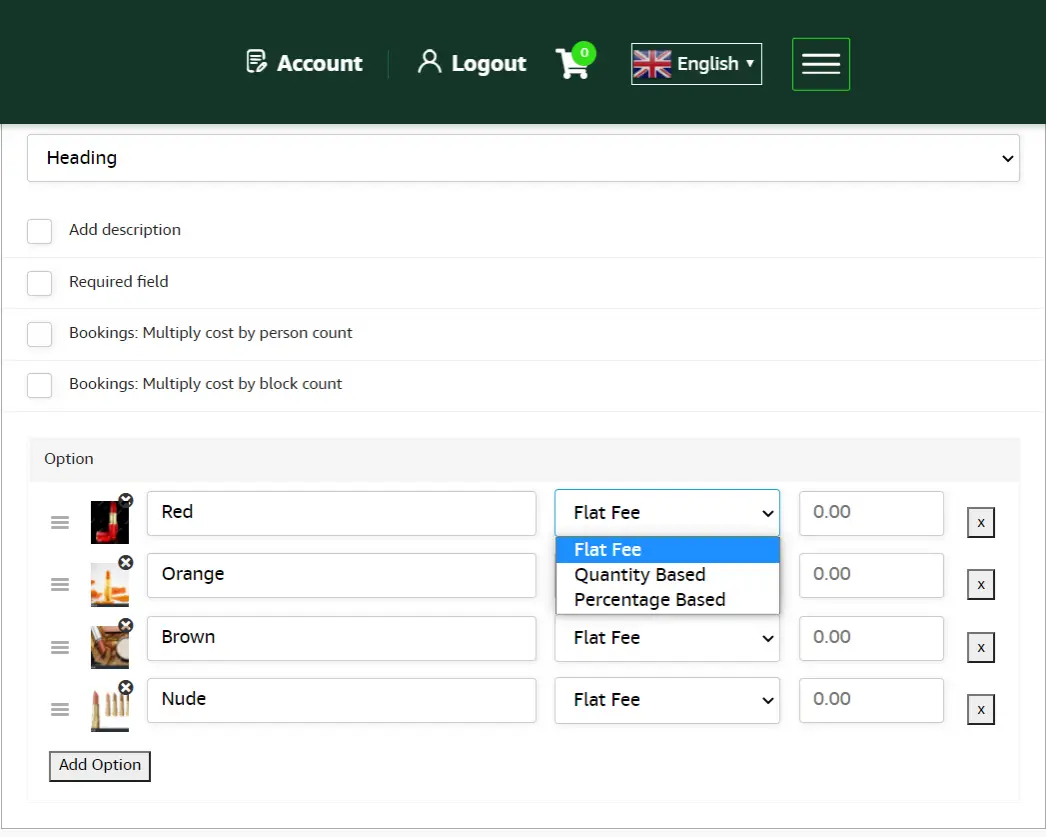
Choose Multiple choice >> Display as >> Write a title >> Format title >> Enter an option
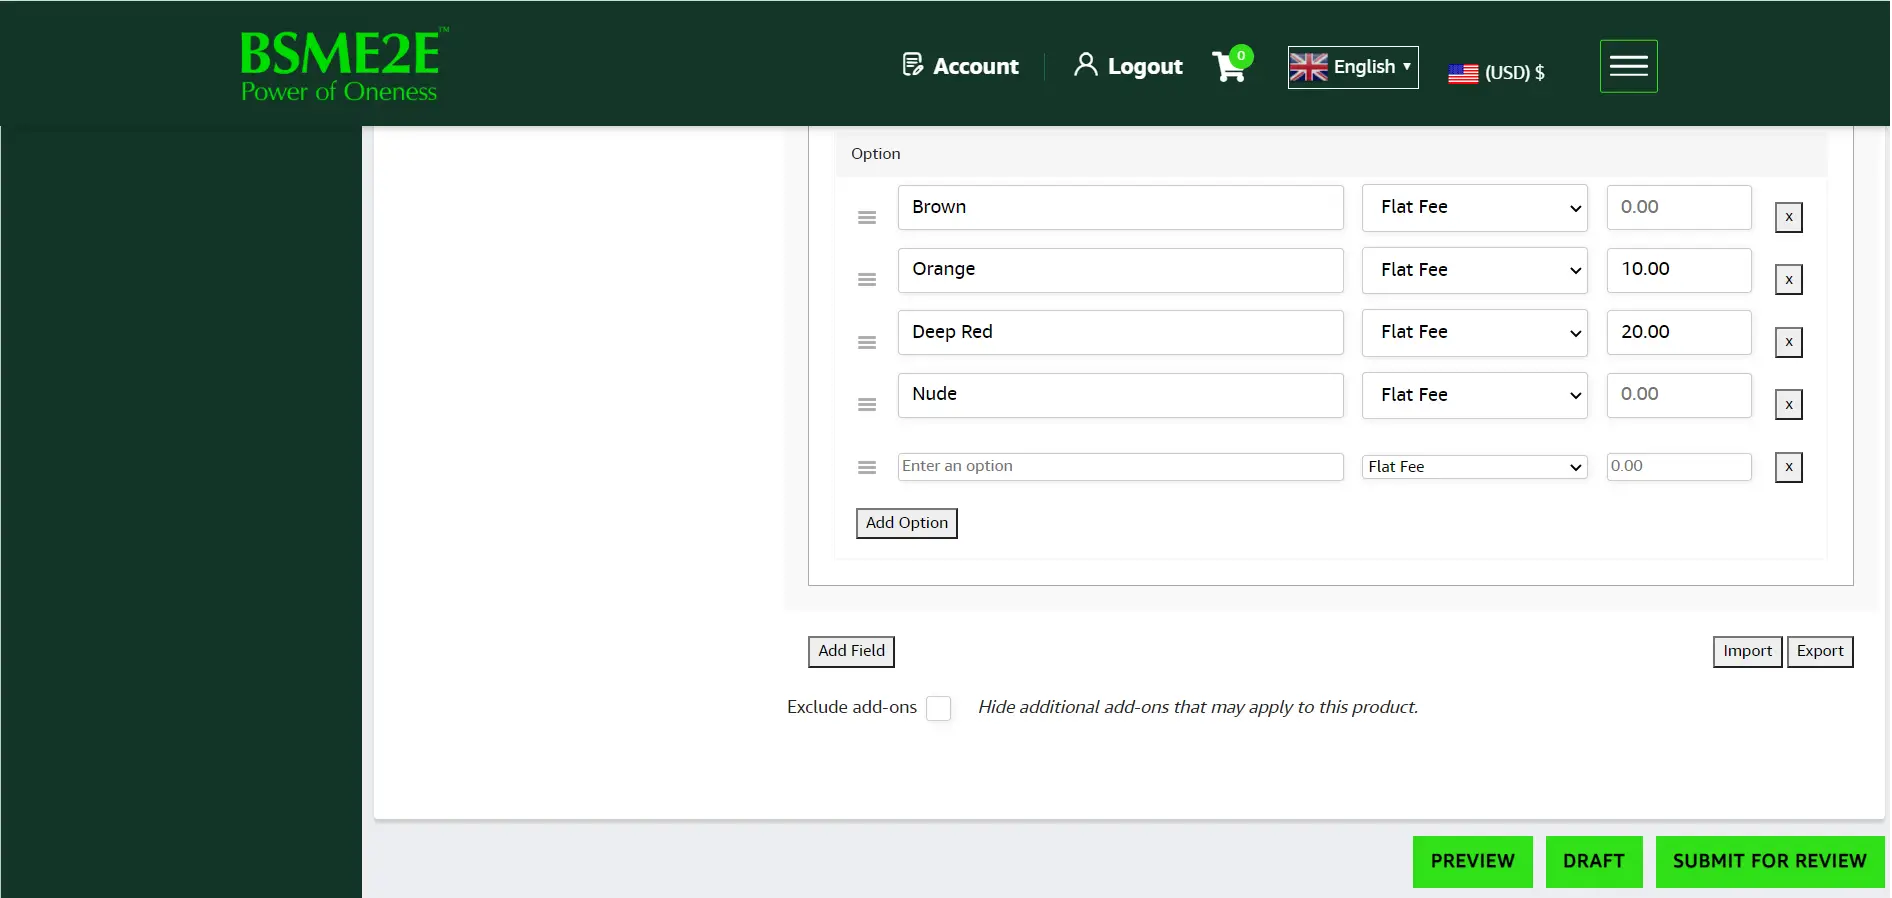
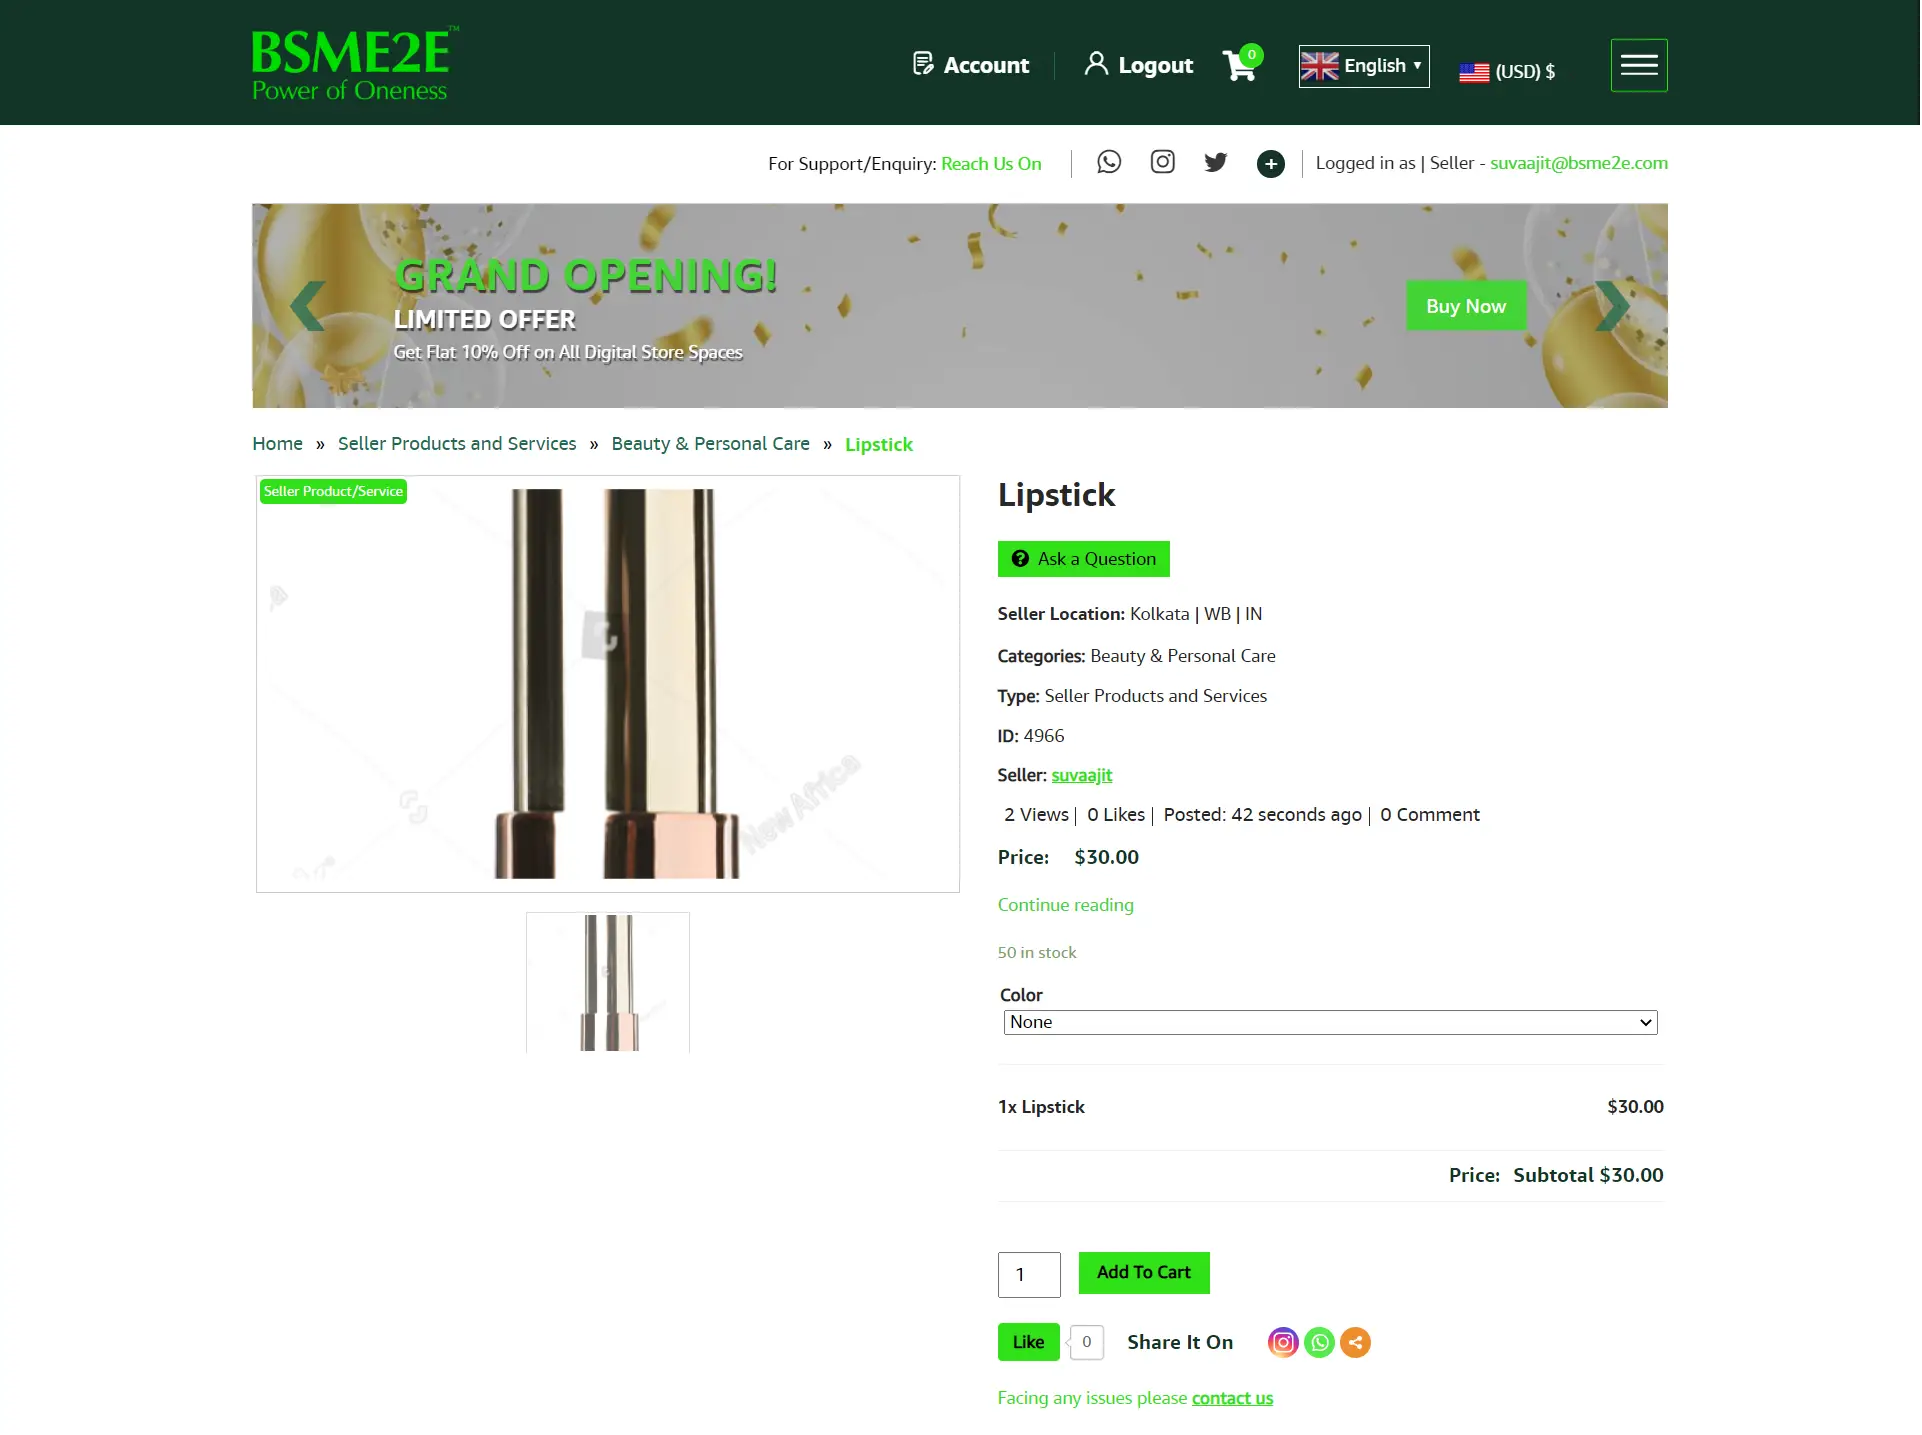
In this example, our title is ‘COLOR’ and the format title is LABEL. You need to add the color names inside the ‘ENTER AN OPTION’ box. If it’s a free product, then do not add any price. But if the add-on product is a paid one, mention the price inside the price box which is displayed as ‘0.00’. We have selected ‘DROPDOWN’ as our ‘display as’ mode.
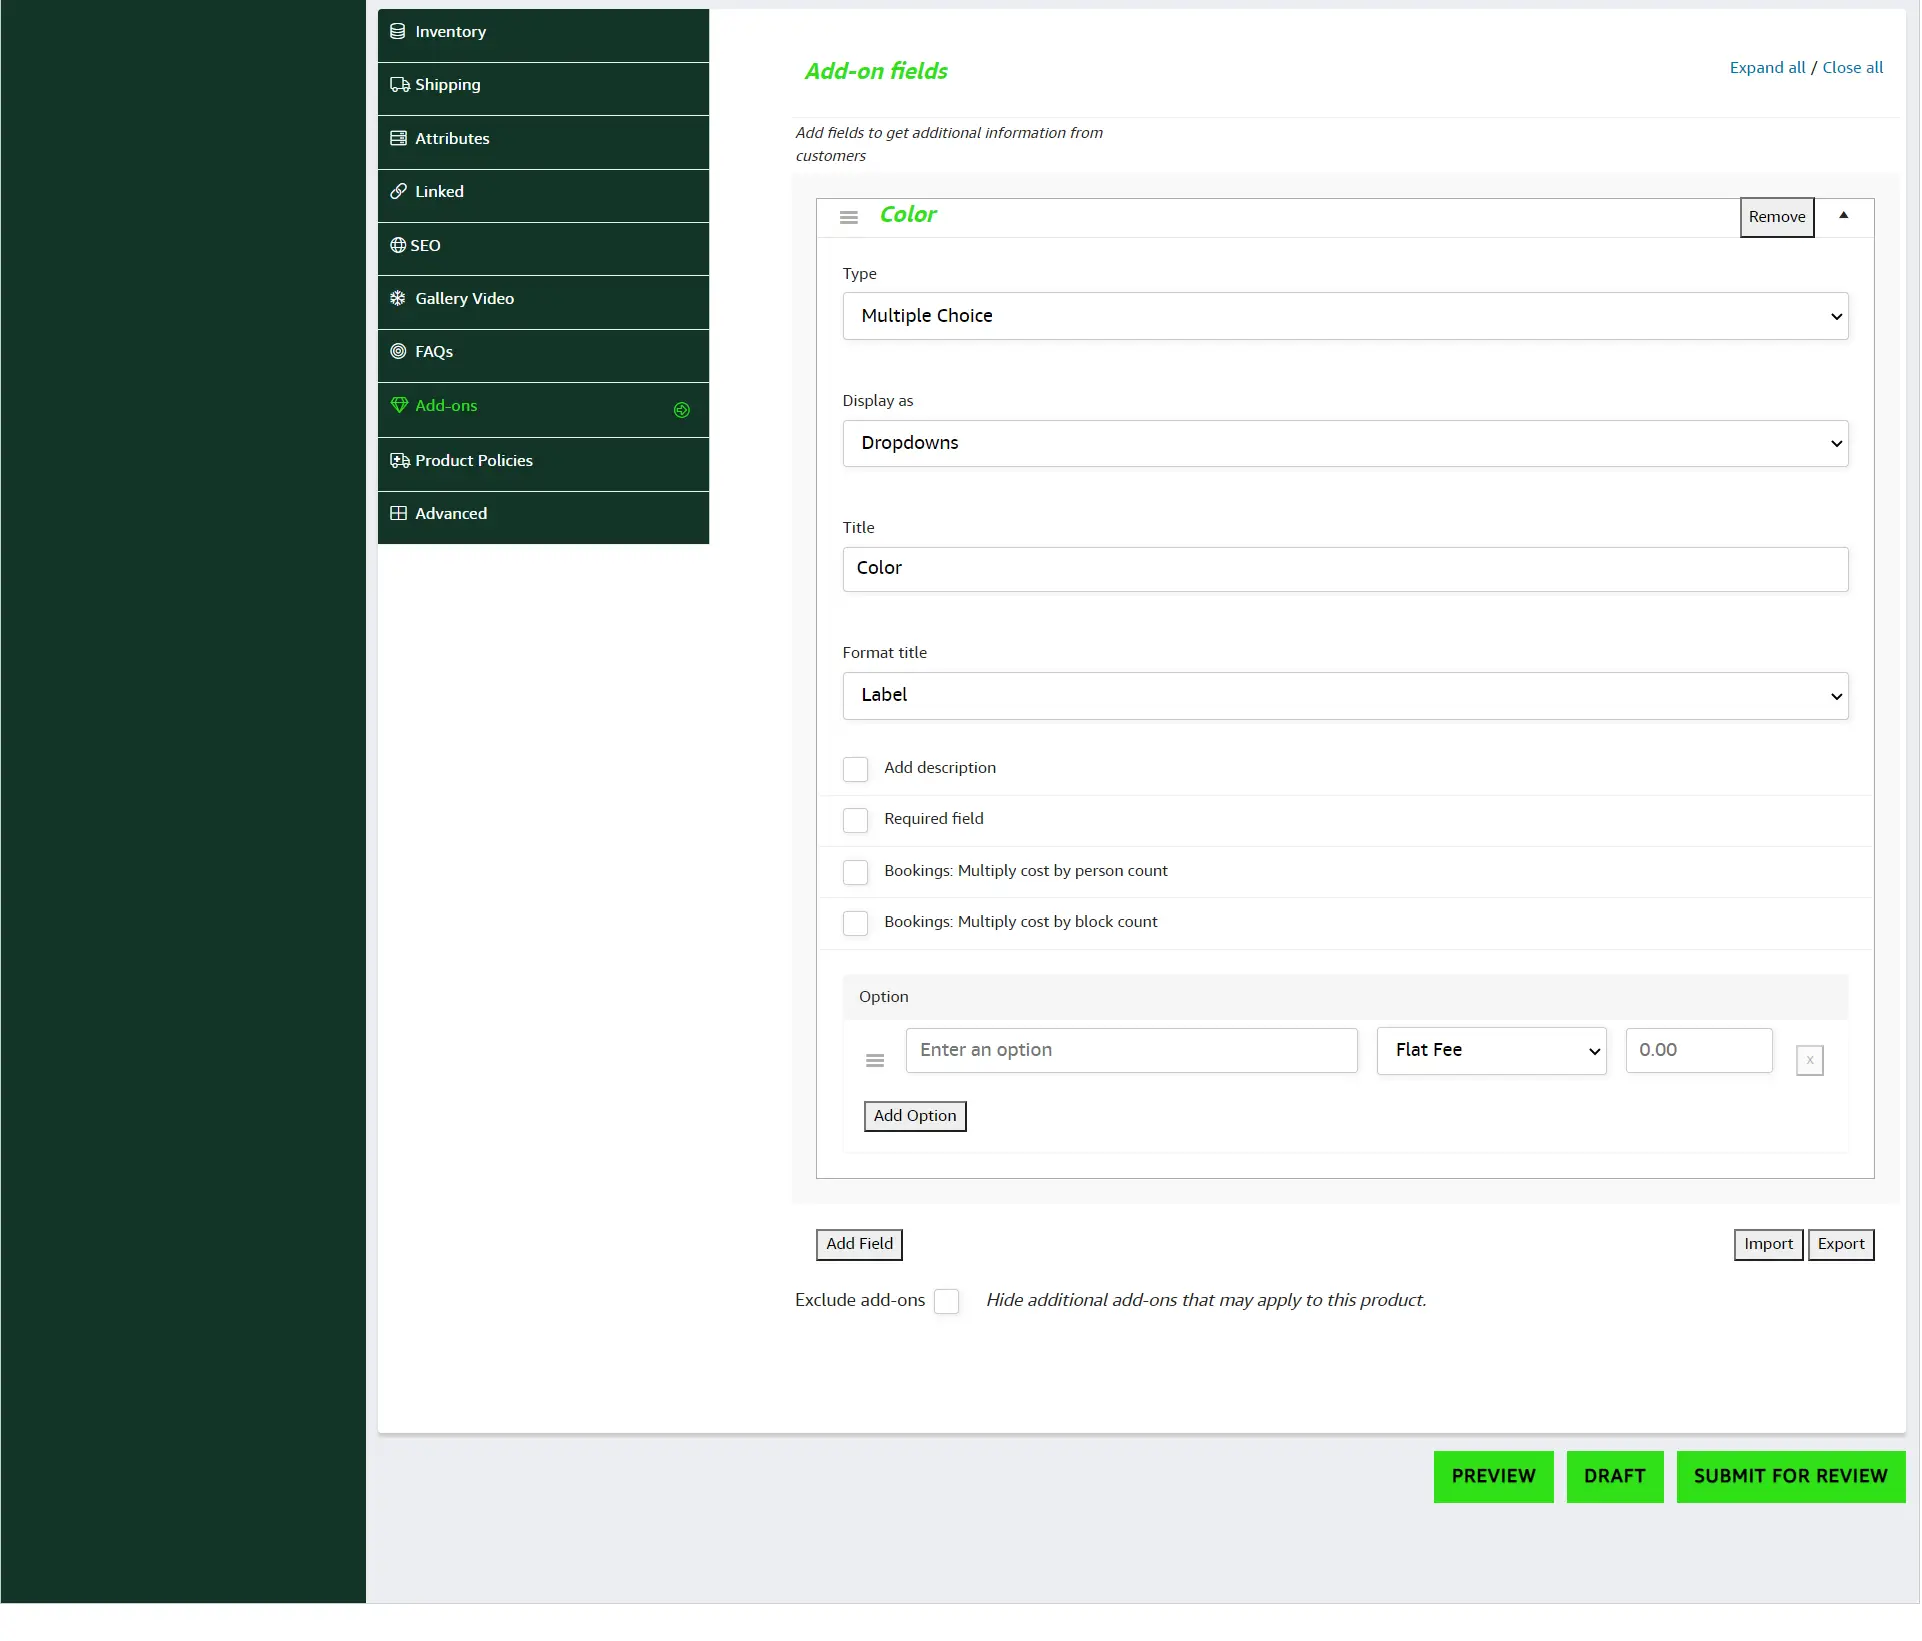
Refer to the below screenshot to check how you have to add the colors.
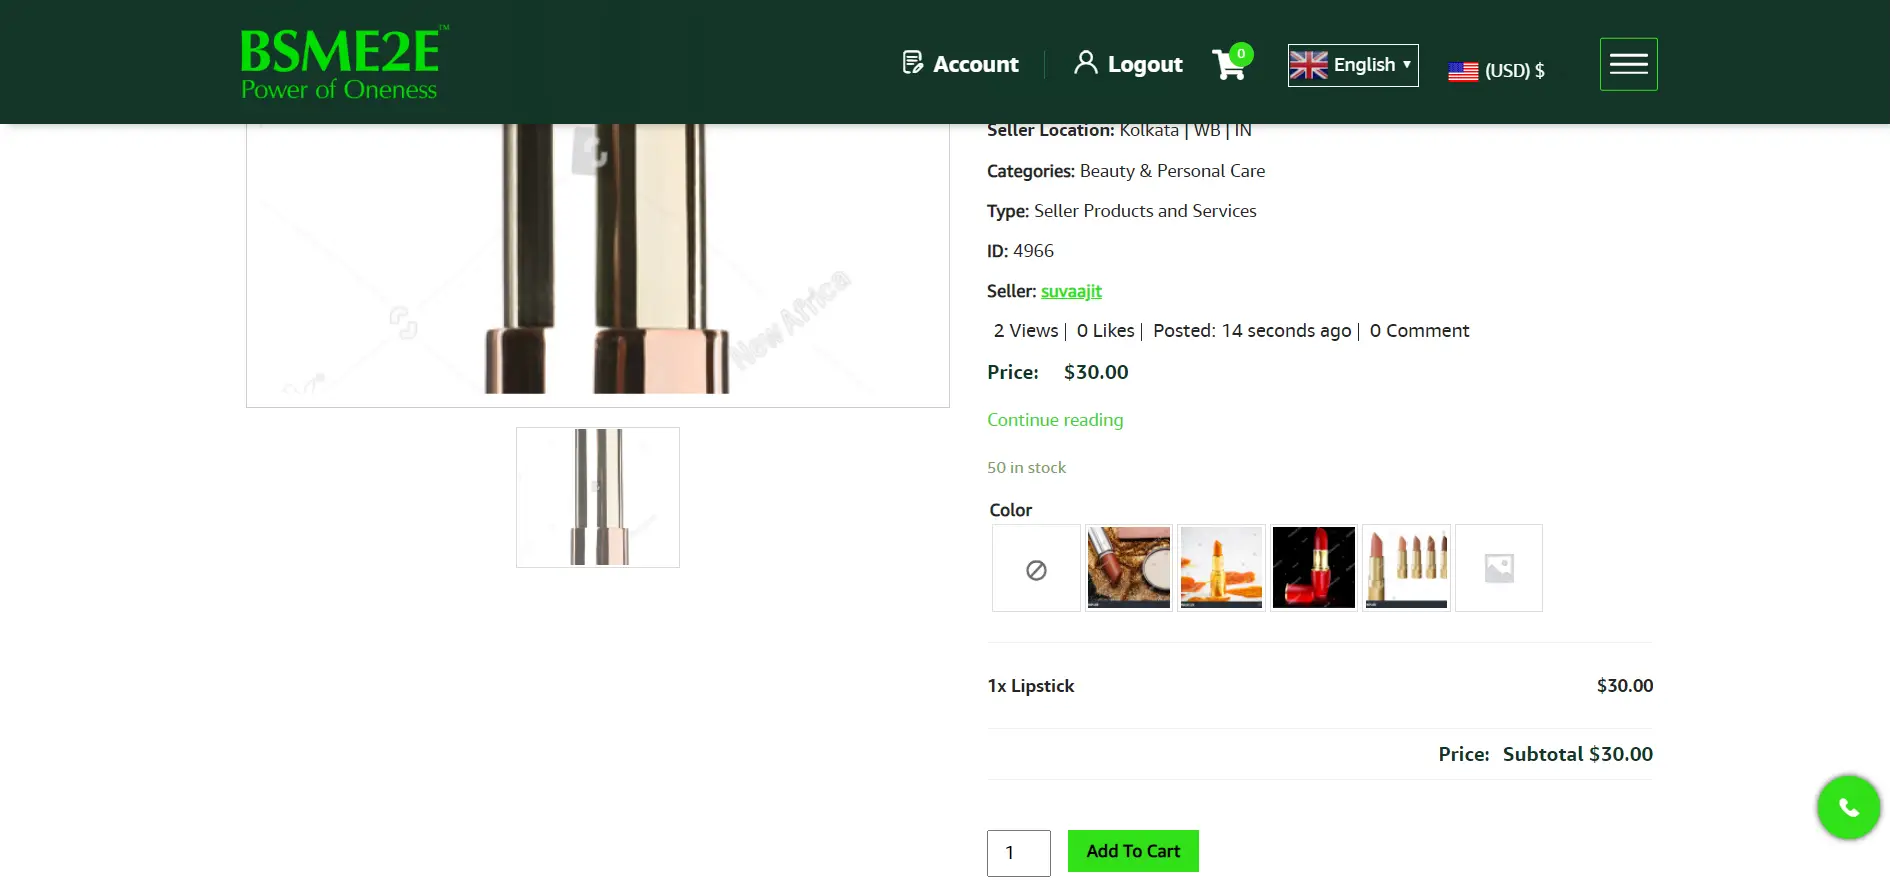
Submit for review. Once published, click on the VIEW mode. You’ll be able to see how your settings are being displayed to your customer.
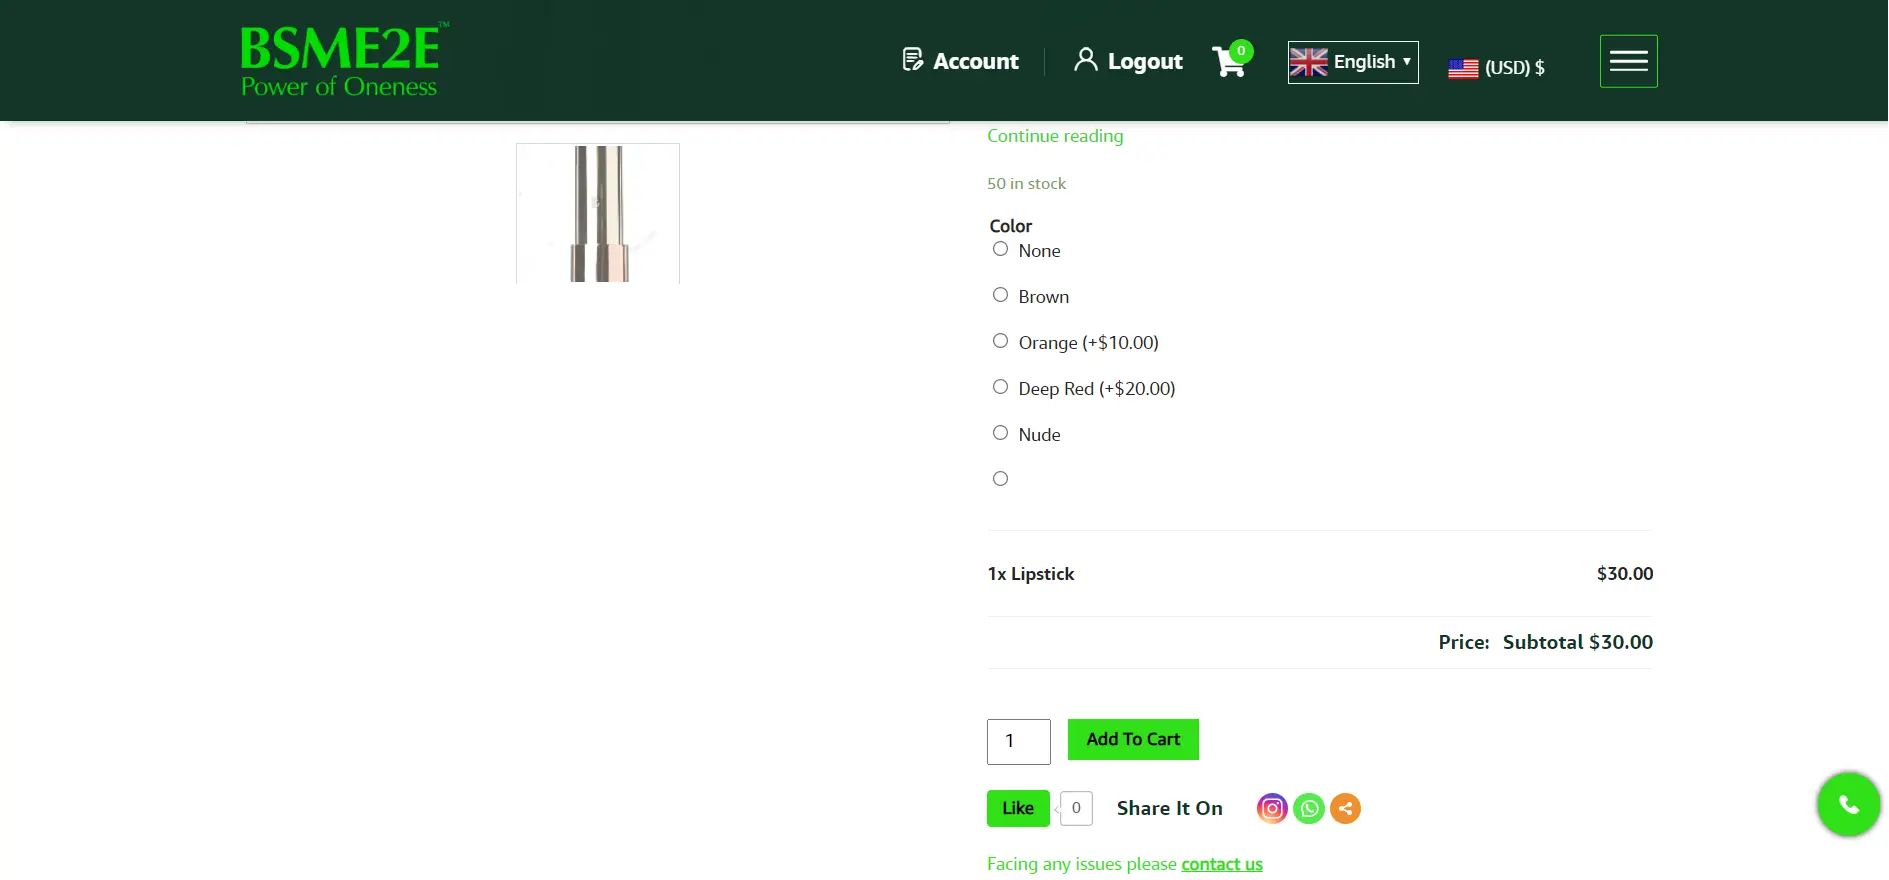
You can change the display mode according to your wish. If you display as ‘RADIO BUTTONS’, then it will be exhibited in a different way. Refer to the sample screenshot below.
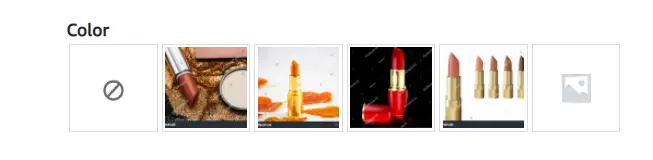
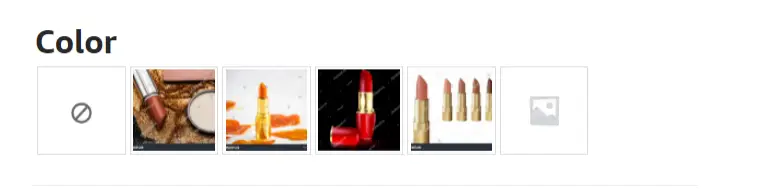
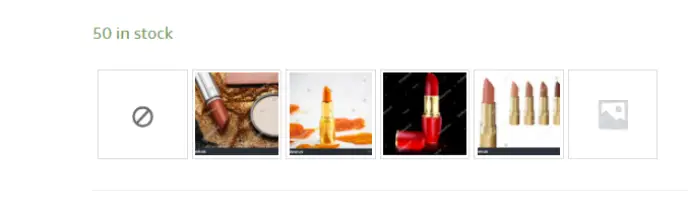
If you choose display as ‘IMAGES’, then you need to add images for the add – ons.

Click on the ‘image’ icon behind the color names to add images.
Submit for review and click on the VIEW mode.
The format title can be changed as per your desire. Our title in this example is ‘COLOR’. Check the image below to understand the difference between the different format titles.
If you choose ‘LABEL’, the title will be displayed as a label.
If you choose ‘HEADING’, the title will be displayed in the manner shown in the screenshot below.
If you choose ‘HIDE’, the title won’t be displayed.
In this option, customers can choose more than one option. In our example, we have selected field type as ‘CHECKBOXES’, Title remains the same i.e. ‘COLOR’, and Format Title as ‘LABEL’.
Let’s take a look at the view mode. As you can see, choosing the field type as ‘checkboxes’ let you choose multiple options.

This option is for the customers. They can enter a single line of text. It can be names, addresses, or engraving texts.
When you select the field type as ‘short text’, you will see a new tab – ‘RESTRICTIONS’. This option limits the type of characters’ customers can enter. Any Text, Only Letters, Only Numbers, Only Letters and numbers, only Email Address.
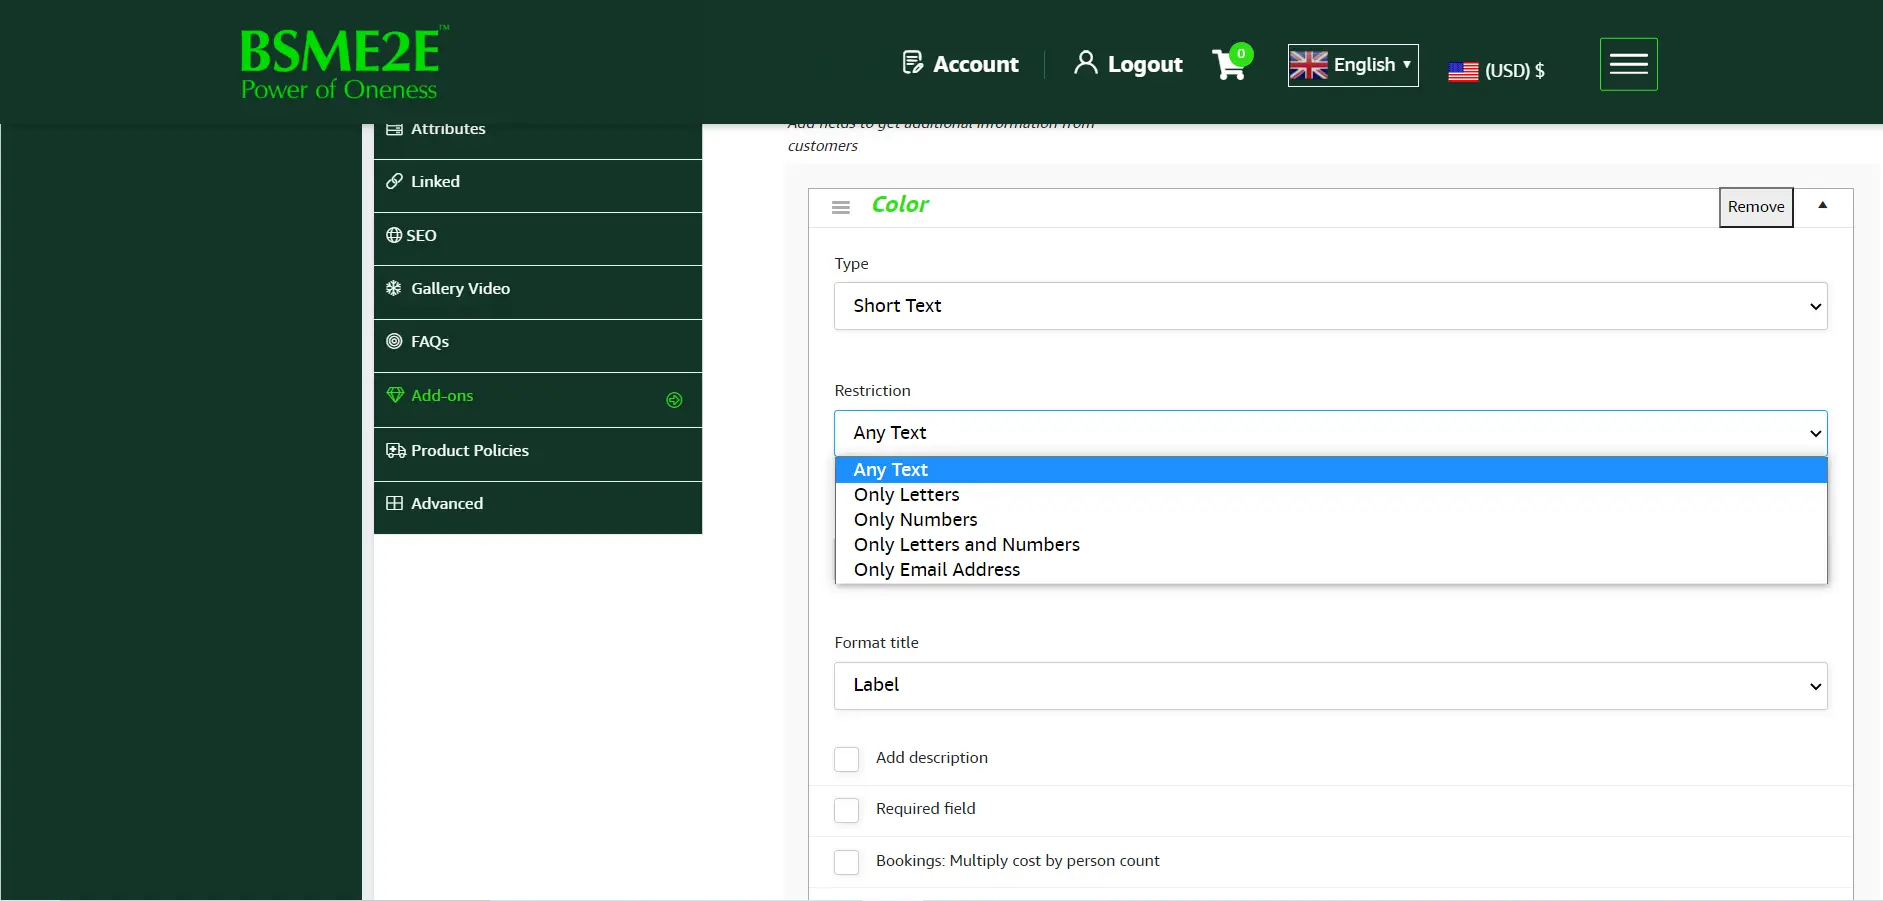
Check the ‘view’ mode to see how it will be displayed to the customers.
Customers can enter multiple lines of text. Examples: A gift note, an address, or special instructions.
In this example, we have set a character length between 50 and 1000. We have also added an additional cost to the add–on.
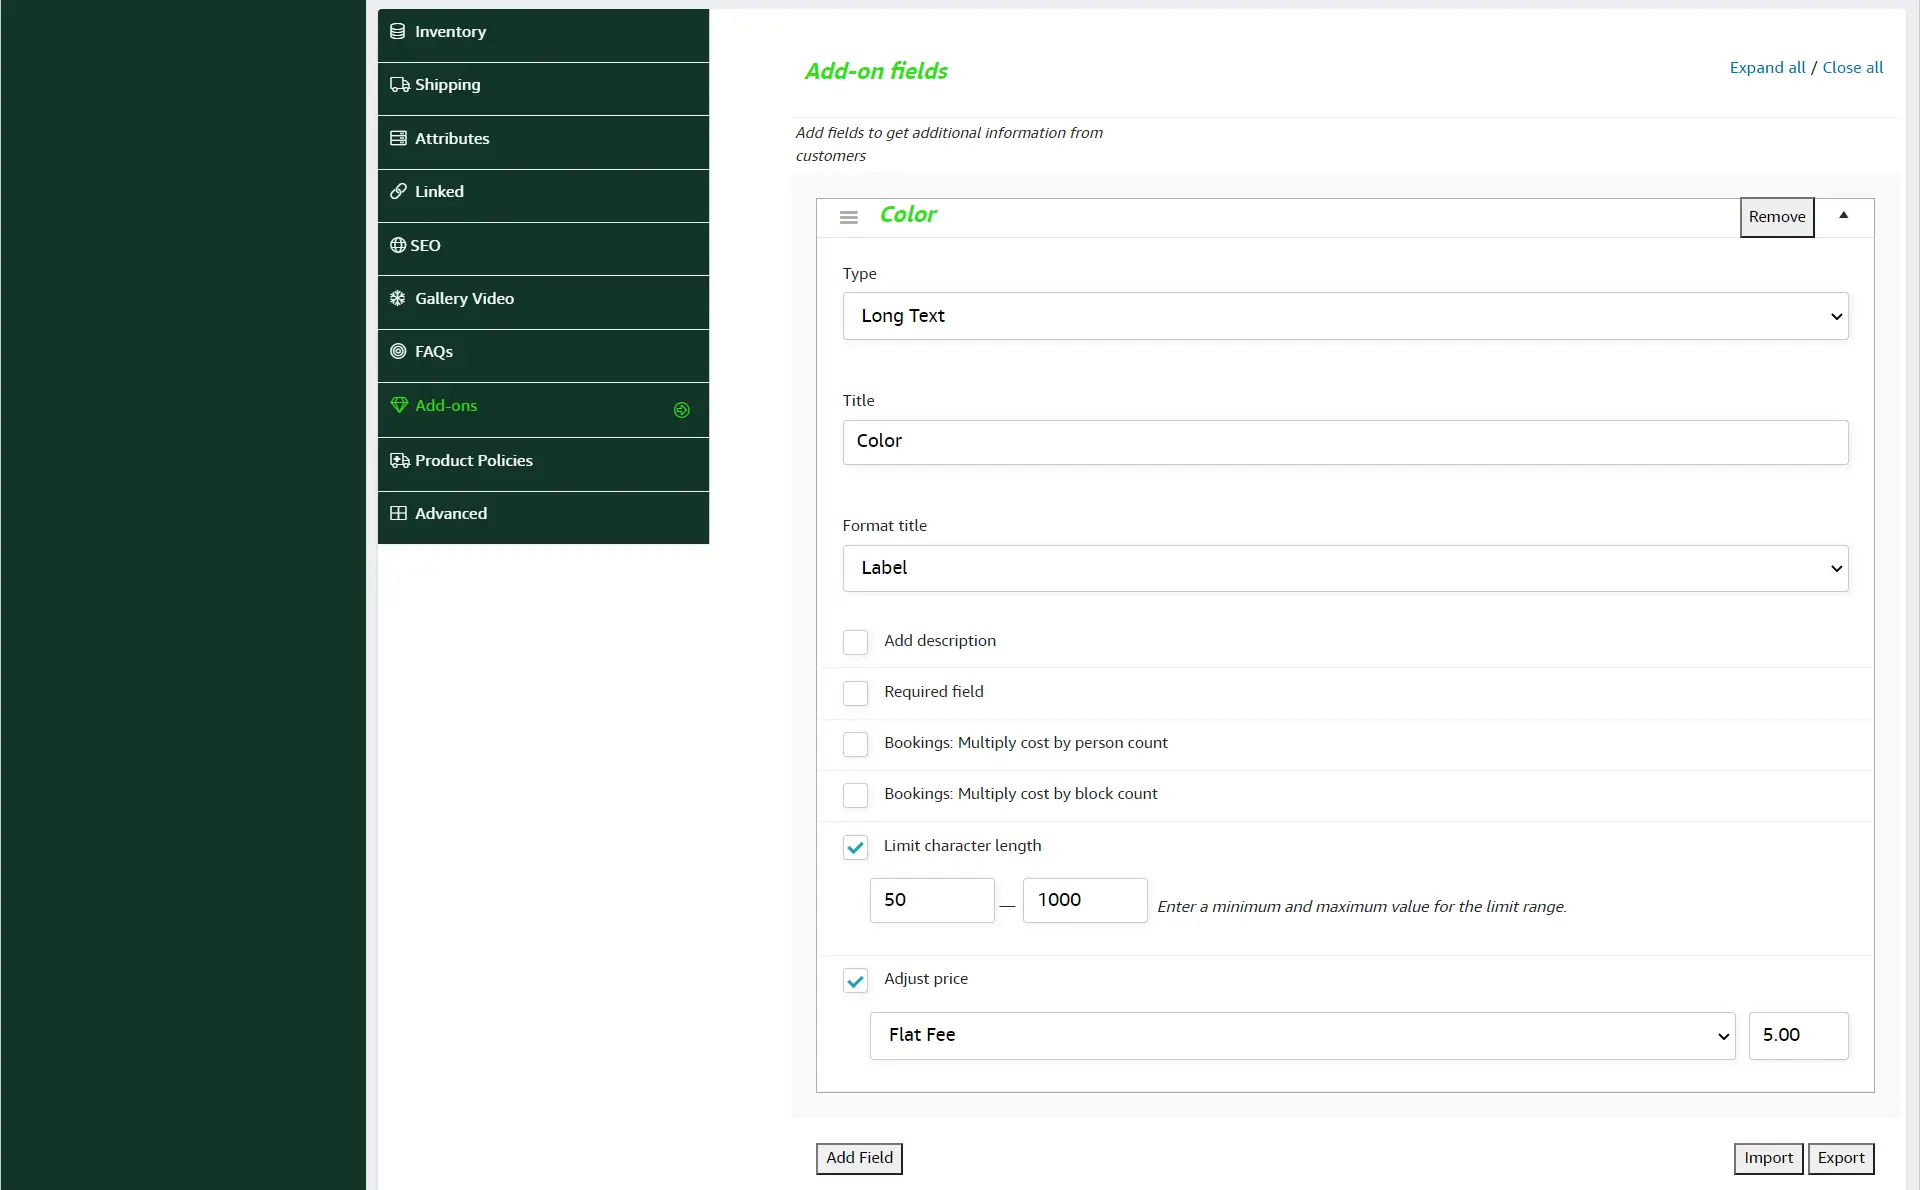
Let’s check the frontend now. Submit the settings for review and click on the ‘view’ mode.

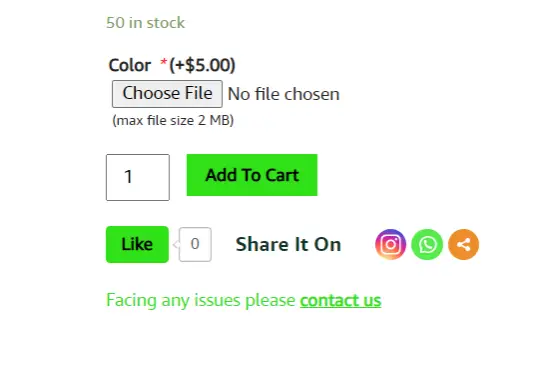
This option can be given to the customers so that they can upload a file. This file may include customization instructions or designs. In our example, this option will not be applicable. However, if your product is mug, t-shirt, or business card; then this option can be given to the customers.
Just for your reference, we have shown you the frontend. On selecting ‘file upload’, the customers will get an option – ‘choose file’. The maximum size limit of the file will be 2 megabytes.
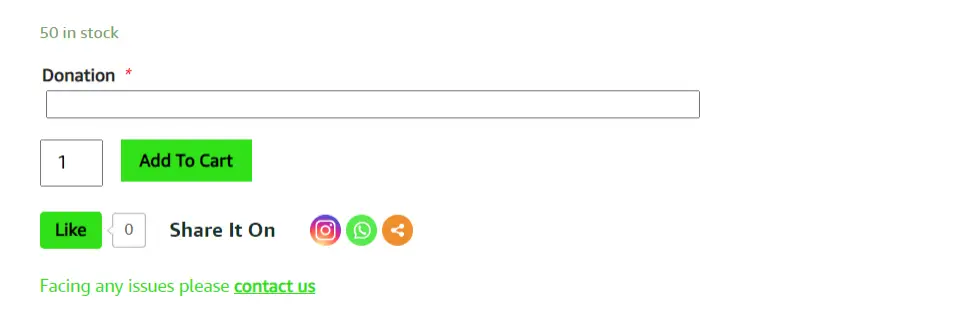
A customer can set their own price which will be added to the total amount. This price can be tips or donations and will be multiplied by the quantity ordered. When you select ‘name your price’ as the field type, you’ll be able to add description and limit price range. In our example, the title is DONATION and the price range is between 10 and 1000. Let’s check the frontend now.
Quantity field type can be used to create a product add-on where customers can adjust its quantity. Check the sample screenshot below.

Submit the settings and click on the ‘view’ mode.
Use headings to separate your add-ons into sections. In this example, our heading is ‘CUSTOMIZE YOUR ORDER.’
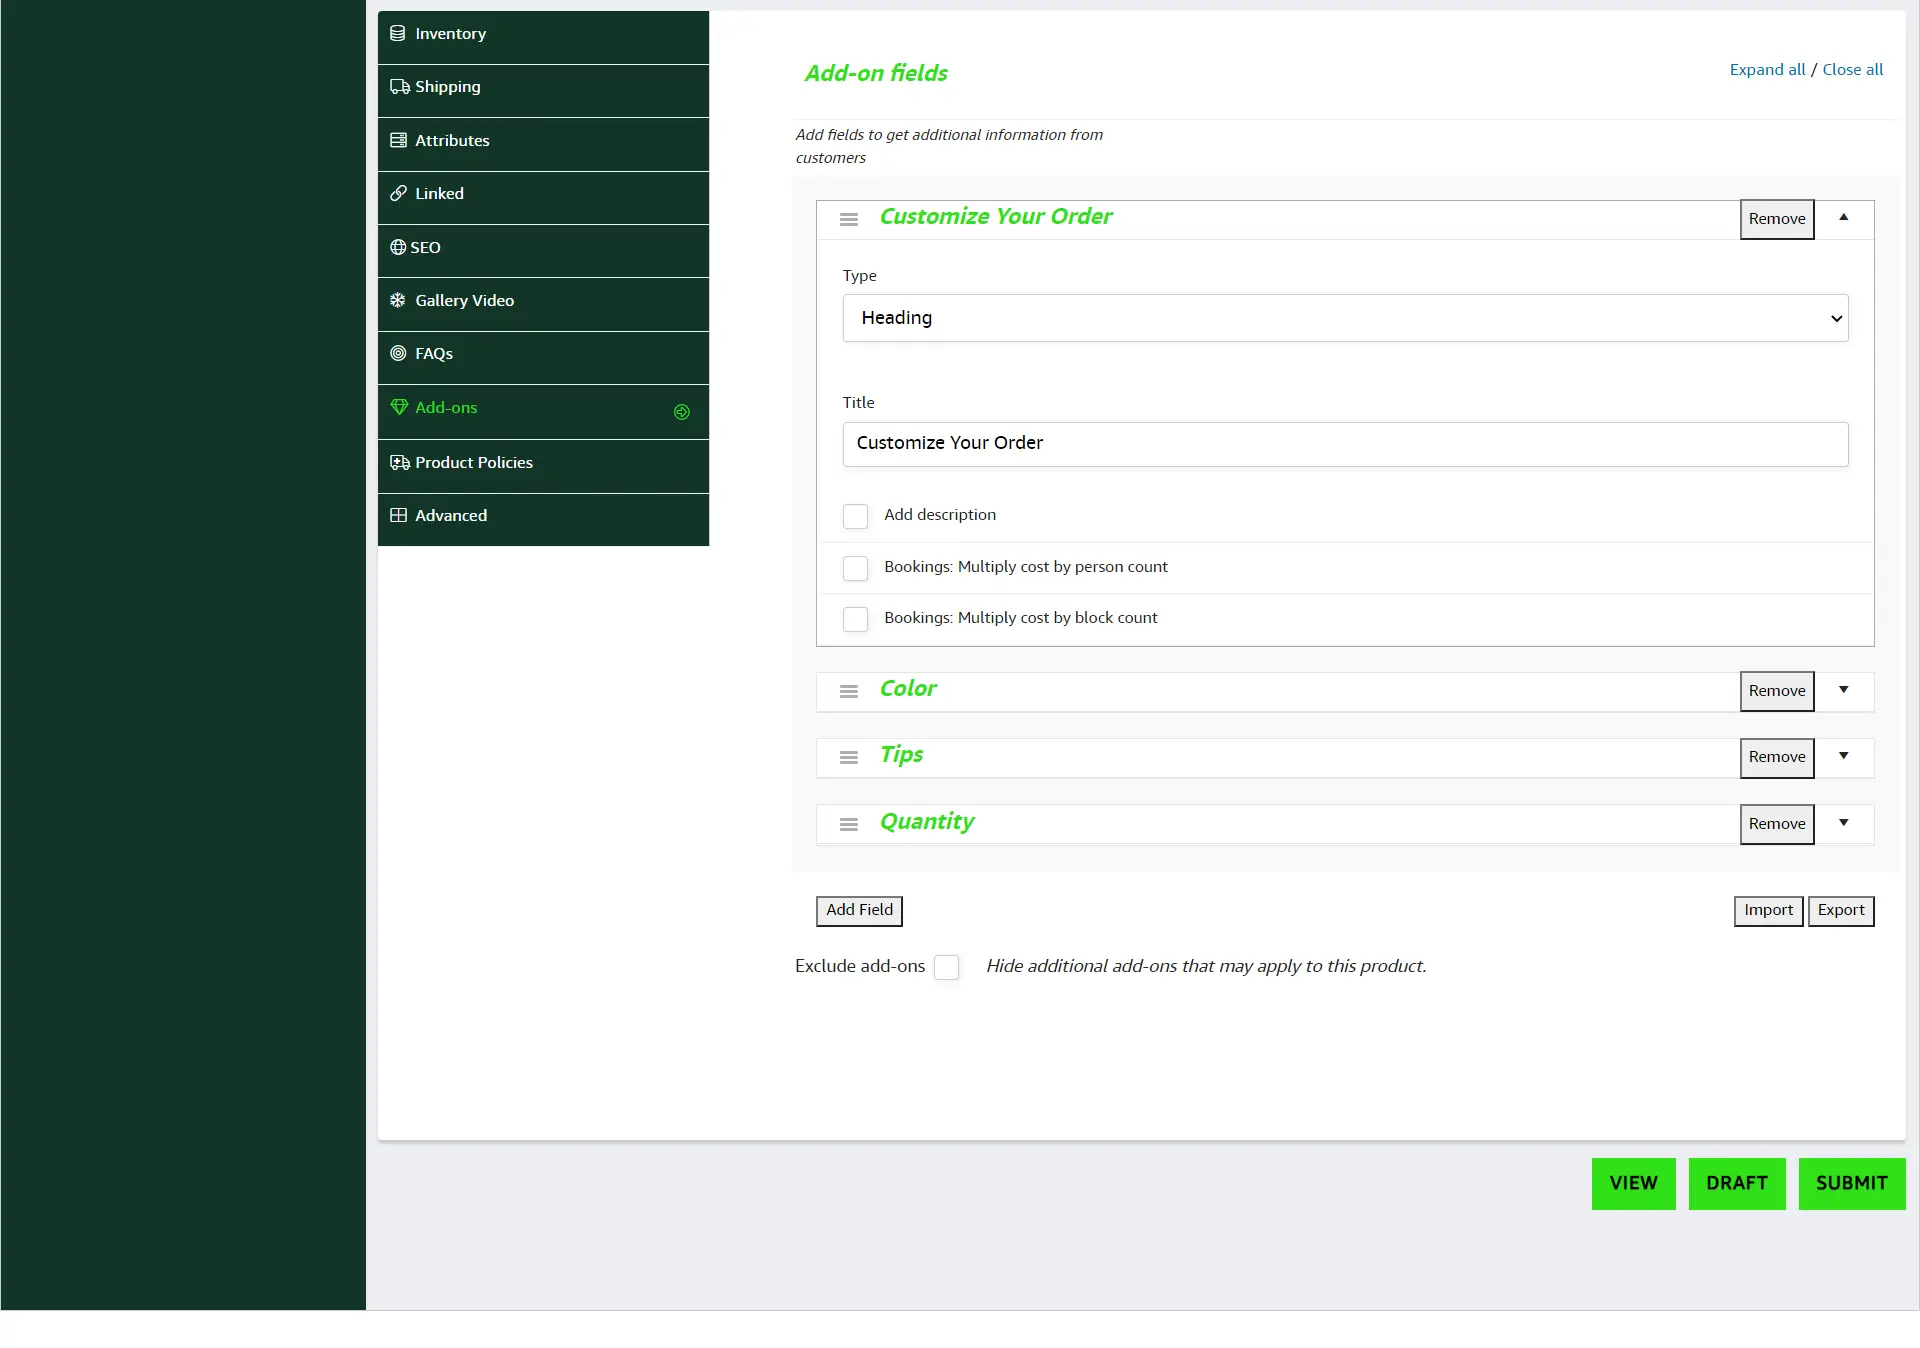
Submit your settings and select the ‘view’ mode to check the frontend. We can see the heading as well as the add on fields that we’ve added.
Prices can increase or decrease the total cost of the product. This option provides three different settings: